Service Request Search Fields
The following is a list of fields found during a service request search. See Search Within a Numeric Range, Perform a Like Search, Perform a Wildcard Search, and Search Within a Date Range for more information on searching this work activity.
General tab
- Request ID(s): Enter the IDs for the service request(s). You can enter multiple IDs separated by a comma.
- Domain: Select a domain.
- Initiated By: Select the initiator's name.
- Proj. Comp. Date: Select the projected completion date.
- Submitted To: Select the name of the individual the service request was submitted to.
- Submit Opened: Select the name of the individual who opened the service request.
- Dispatched To: Select the name of the individual the request was dispatched to.
- Dispatch Open: Select the name of the individual who opened the service request.
 NOTE: While the Submitted To and Dispatched To fields allow you to search for an individual and the date the service request was submitted or dispatched to that individual, the Submit Opened and Dispatched Open fields allow you to search for the individual and the date they opened the service request.
- Closed By: Select the name of the individual who closed the service request.
- Canceled By: Select the name of the individual who canceled the service request.
- Details: Enter any details about the service request to include in the search.
- Comments: Enter any comments about the service request to include in the search. You may include special characters when searching for comments that are bold or otherwise formatted. If you include the special characters, the search results are filtered only to words that are formatted that way. User mentions can be searched by entering @ and the username of the employee.
- Priority: Select the priority level of the service request.
- Status: Select the status of the service request.
- Past Due: Select Yes or No to indicate if the service request is past due. This searches for records that are past due based on the projected finish date. You can also select Null to search for null results.
- Resolution: Select the final outcome of the service request. These are defined in Designer under Preferences > Service Request.
- Completed?: Select Yes or No to indicate if the service request is completed. You can also select Null to search for null results.
- Emergency?: Select Yes or No to indicate if the service request is an emergency. You can also select Null to search for null results.
- Closed?: Select Yes or No to indicate if the service request is closed.
- Canceled?: Select Yes or No to indicate if the service request is canceled. You can also select Null to search for null results.
- WO Needed?: Select Yes or No to indicate if a work order is needed for the service request. You can also select Null to search for null results.
- Work Order ID: Enter the work order ID associated with the service request.
- Has Work Order: Select Yes or No to indicate if the service request has a work order associated to it.
- Has Inspection: Select Yes or No to indicate if the service request has an inspection associated to it.
- Has Pll Case: Select Yes or No to indicate if the service request has a PLL case associated to it.
- Has Attachment: Select Yes or No to indicate if the service request has an attachment.
- Project: Select a project associated to the service request.
- Labor Cost: Enter the labor cost.
- Category: Select a service request category.
- Map Page: Enter the map page.
- Shop: Select a shop.
- Tile No.: Enter the tile number of where the service request is located on the map.
- X Min: Enter the X minimum coordinate.
- X Max: Enter the X maximum coordinate.
- Y Min: Enter the Y minimum coordinate.
- Y Max: Enter the Y maximum coordinate.
-
Facility Id: Enter the Facility ID for the building where the incident occurred.
-
Level Id: Enter the Level Id for the floor where the incident occurred.
- Init App: Search for service requests, work orders, or inspections that were created by an outside application.
Details Tab
- Address Type: Select Null, Parcels, or Streets. The contents of this list are populated by the administrator in Designer under Preferences > Custom Codes > PADDTYPE.
- Address: Enter all or part of the incident address.
- Prob. District: Select a problem district.
- Apt Number: Enter the apartment number.
- City: Enter the city.
- State: Enter the state.
- Zip Code: Enter the zip code.
- Street Name: Enter the street name.
- Landmark: Select a landmark.
- Location Details: Enter any location details.
- Problem Details: Enter any problem details.
- X/Y Location: Enter the X and Y coordinates.
- Incident No.: Enter the incident number.
- Call Date: Enter the call date.
- Account: Enter the account number.
- Caller Type: Select the type of caller.
- Title: Select the caller's title.
- Name (F, M, L): Enter the first, middle, and last names of the caller.
- Caller Address: Enter the caller's address.
- Cust. District: Select the caller's district.
- Apt. Number: Enter the caller's apartment number.
- Cust. City: Enter the caller's city.
- Cust. State: Enter the caller's state.
- Cust. Zip Code: Enter the caller's zip code.
- Day Phone: Enter the caller's day phone number.
- Other Phone: Enter another phone number for the caller.
- Cell Phone: Enter the caller's cell phone number.
- Fax: Enter the caller's fax number.
- Work Phone: Enter the caller's work phone.
- Email: Enter the caller's email address.
- Caller Comments: Enter any comments from the caller.
- Is Resident?: Select Yes or No to indicate if the caller is a resident. You can also select Null to view null results.
- Follow-Up Call?: Select Yes or No to indicate if a follow-up call is associated to the service request. Depending on how your organization has decided to use this field, this could mean that a follow-up call is needed or was made. You can also select Null to view null results.
- Call Back?: Select Yes or No to indicate if the caller was called back. You can also select Null to view null results.
- Cust. Contact?: Select Yes or No to indicate if the caller was contacted onsite. You can also select Null to view null results.
- Other ID(s): Enter other IDs used in another system.
- Other Status: Enter a status used in another system.
- Other Type: Enter a type used in another system.
- Other Desc: Enter a description used in another system.
- Other Desc 2: Enter a second description used in another system.
Problem Type tab
- Keywords: Enter a keyword to search by.
- Domain: Select a domain.
- Select the desired problem types to search by.
 TIP: In order to see the map layers in the search results, make sure to select the Map Layer Fields Visible in Search Results check box.
Custom Fields tab
- Category: Select a category from the drop-down list. Depending on the category selected, fields appear. Select the desired custom fields to search by.
- Custom Fields Visible in Search Results: Highlight all the fields to be returned in the search.
Keywords or selected service request problem types show in the Search Query panel.
The following fields are found on the service request search toolbar.

- Search: Click to search for service requests.
- Clear: Click to clear the Search Query panel.
- Open: Click to open a list of service request saved searches.
- Save As: Click to use the search criteria to create a saved search.
The following fields are found on the search results toolbar.
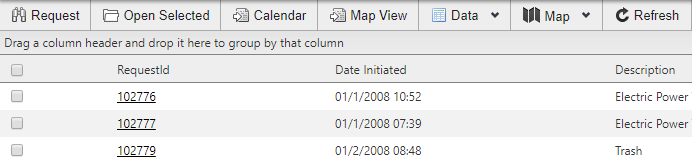
- Request: Click to return to the Search Query panel and revise the search or start a new one.
- Open Selected: Click to open any selected service requests.
- Calendar: Click to view the search results in a calendar. See Calendar for more information.
- Map View: Click to view the search results in a map. Click Grid View to return to the search results list.
- Data: Click to view a list of options:
- Summarize: Click to summarize the search results.
NOTE: To summarize data, you must first group the data by dragging a column header to the top of the search results panel.
- Move Calls: Click to move calls from the selected service request to another one. See Move Calls to a Different Service Request for more information.
- Expand/Collapse: Click to expand or collapse the search results when they are grouped by a field.
- Print: Click to print the search results.
- Export: Click to export the search results.
- Map: Click to Remove Pins or Refresh Pins on the map, or to plan a Route to the service request. Gray map pins are used to mark the location for each record. The green map pin marks the record that is currently selected. Also, if you hover your mouse over a record in a search results list, the pin for that record turns green. The map pin marks the geocoded location.
- Refresh: Click to refresh the page.